Lesson 3
Part 1: Time Culprits.
The key to these time and movement assignments is to remember that the REAL differential is not whether something in your scene is MOVING, but rather, whether or not something in your shot is CHANGING RELATIONSHIP WITH YOUR FRAME.
And so I’ll remind you that there’s a huge difference there. And while we touched on that distinction a bit last week, I find it usually takes several case studies before that concept fully sinks in for most students.
So let’s go through each of the assignments one by one, and discuss the primary culprits that might have undermined the image.
Keep in mind, I am interested in TIME culprits only, not LIGHT culprits, which means that if your image failed to come off because you couldn’t get the proper “exposure,” we’ll just set that shot aside for now. It’ll take a few more weeks before all of the ins and outs of “exposure” have been fully fleshed out, so for the moment, I’m only interested in TIME culprits.
Assignment #1, FROZEN ACTION:
Let me begin by stating that this assignment was by far the simplest that we’ll have throughout this entire Photography 1 course.
The likeliest reason a student might have experienced any failure here is more due to LIGHT, not the TIME.
For instance, if they attempted these kinds of shots indoors or at night, they were going struggle mightily to achieve a decent exposure with such fast shutter speeds and so little light to work with. But had they heeded the instructions to do this in bright daylight, they shouldn’t have had too many problems.
So in terms of “culprits,” there are really only two that anyone ever seems to experience here.
The first one was mentioned last week, which was that, in many cases, freezing the action of your scene often just serves to deprive the viewer of any knowledge that anything in the scene was moving:

How do we know the fan was even turned on?
The idea here was that freezing the action has eliminated any VISUAL CUE that there was movement in the scene.
Which isn’t necessarily a bad thing, you just need to be in control of whether you want a movement cue in the shot or whether you don’t want one. And as long as you’re making that decision consciously, I have no problem with it either way.
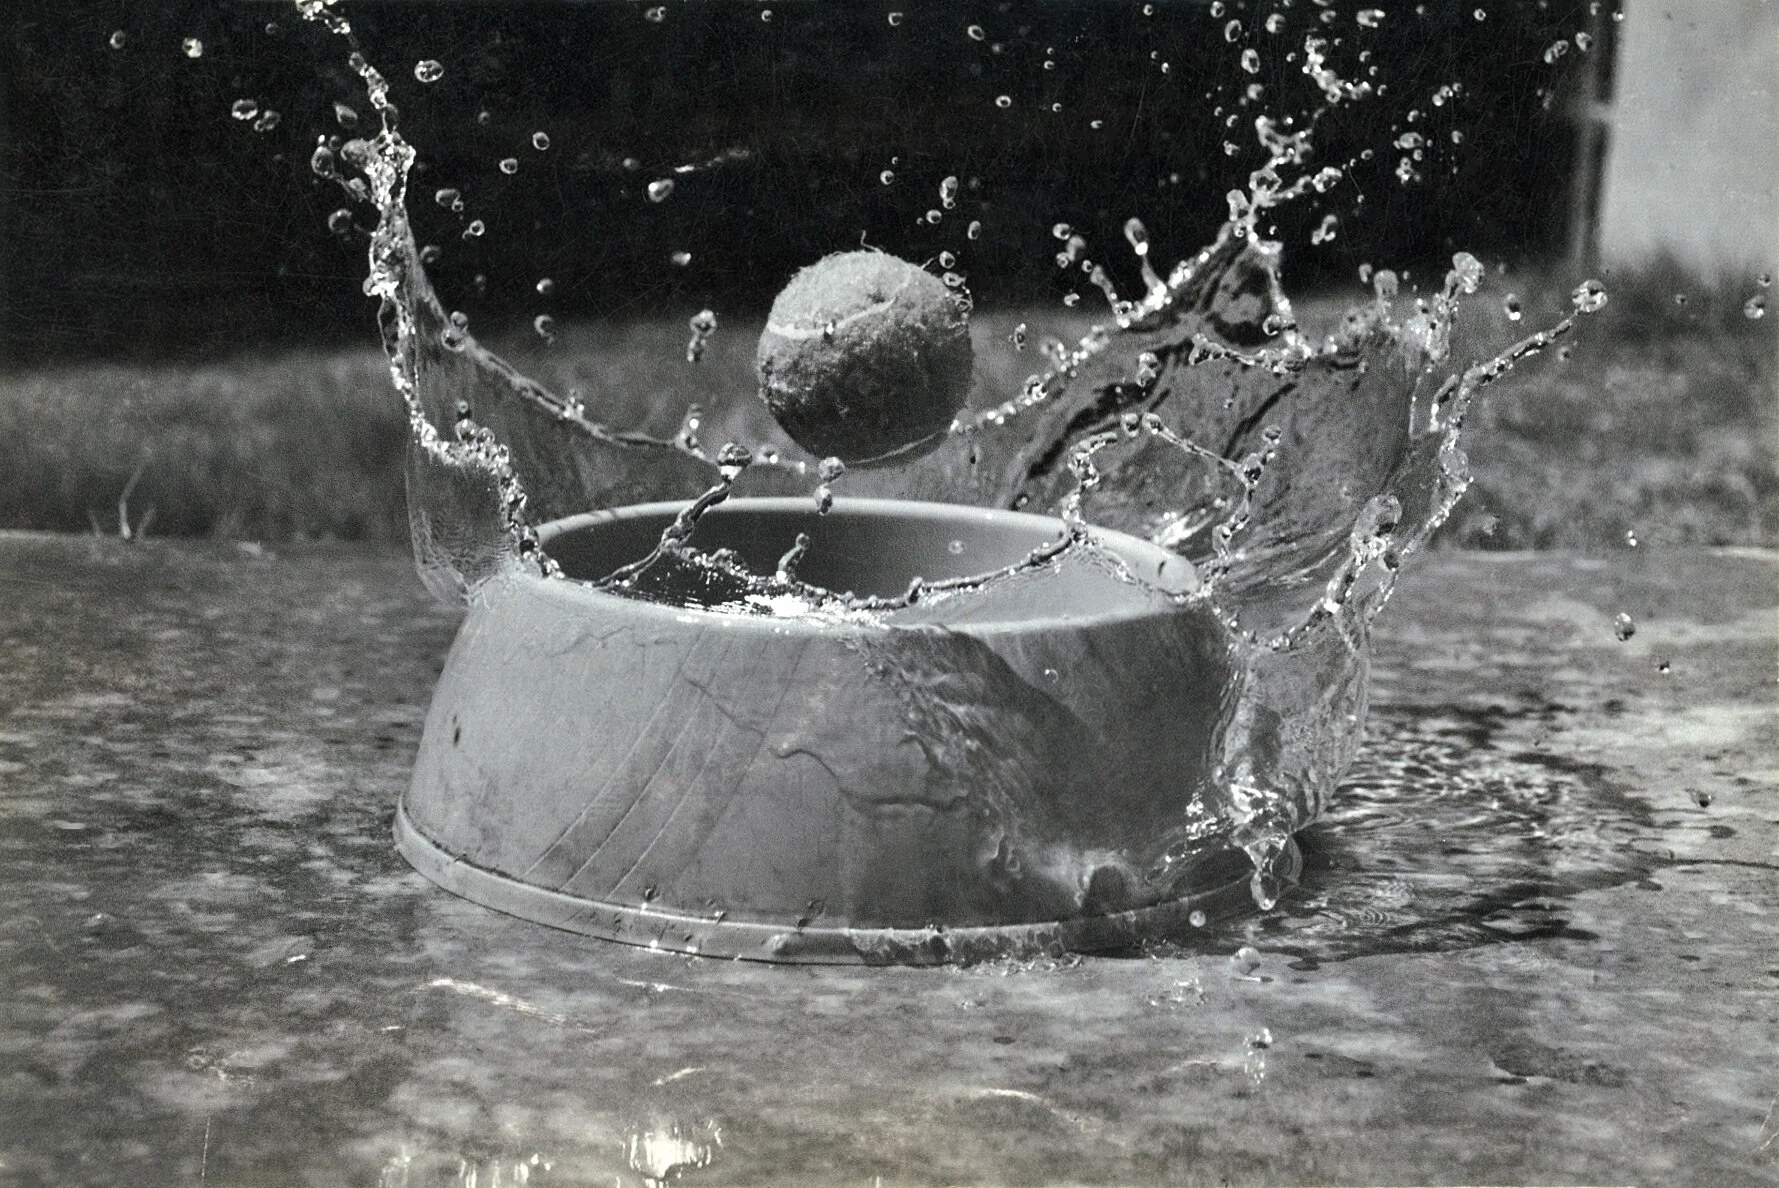
But the other ‘culprit’ people tend to encounter on this assignment is probably best illustrated with this case study here:

Students will see the examples of “frozen water” that I sent with the homework instructions, and then they’ll try to shoot a household faucet in their kitchen or bathroom, thinking they can freeze the water that’s spilling out. But then they find that the shot sort of looks the same NO MATTER WHAT SHUTTER they use.
See, the problem with a shot like this is that it violates our number 1 cardinal rule about time dynamics.
The “pour” of water coming out of this faucet is constant and regular, which means that it forms a solid “shape of water” …..and then that shape is permanently fixed in your image.
In other words, was something MOVING in our scene?
Yes.
Was anything CHANGING RELATIONSHIP WITH OUR FRAME?
No.
And remember….that’s all that ever matters to us.
So in essence, this is the same deal as the “spinning top” example I gave last week, wherein the top is literally spinning in reality, but isn’t moving in your frame.
For the top to move in the frame at all, it would need some imperfections in how it was moving, meaning that it would need to wobble a bit from side to side, or start moving around to different parts of the table it’s spinning on.
But if if it is spinning perfectly in place, then you have a solid, unchanging shape in one part of your frame, and that shape is never CHANGING RELATIONSHIP with your frame.
And similarly, the water pouring from your faucet can’t be a perfect, permanent, cylinder of water….it needs some irregularities too:

….so that something is CHANGING in your frame.
Or better yet, if the faucet was dripping:

….then you have an entire entity (an individual droplet of water) MOVING ACROSS YOUR FRAME.
But can you see, now, in retrospect, that in that first example…..nothing in the shot was changing relationship with the frame? Which means we didn’t have our DIFFERENTIAL. And if the differential doesn’t exist in your shot, then we can’t employ any strategies that might exploit that differential.
But like I said…..other than that, students don’t tend to hit a lot of snags on this assignment. Which is to say that they nearly always successfully “freeze” the action.
But does that mean they LIKE all of the pictures they’ve taken?
Of course not.
But if they “don’t like” the outcome of the shot, it’s usually for reasons that have nothing to do with the time aspects of the image.
For instance, perhaps they don’t like their composition, or perhaps the shot is a little “out of focus,” or perhaps they don’t think they’ve captured a very interesting moment, etc.
But again, we don’t care about any of those other things this week.
All we cared about was whether you were able to “freeze” the action. And so long as you were shooting in an environment with sufficient light, then the answer to that question was almost certainly ‘yes.’
In fact, you even had a pretty healthy margin for error to pull this off. If most action freezes by, say 250, then if you had used 500, the action should STILL have been frozen. Ditto for 1000. Or 2000. And so forth.
In other words, for most moving subjects you encountered (with the exception of some very extreme outliers….such as actual bullets and humming birds), you should have had a window of MULTIPLE different shutter settings that would have yielded the exact same result.
So by that metric, this was a relatively easy assignment, and one in which students tend to achieve nearly 100% success.
But then students get to assignment 2.